Showing posts with label Cakes. Show all posts

Sunday, November 16, 2014

Chocolate Banana Bread

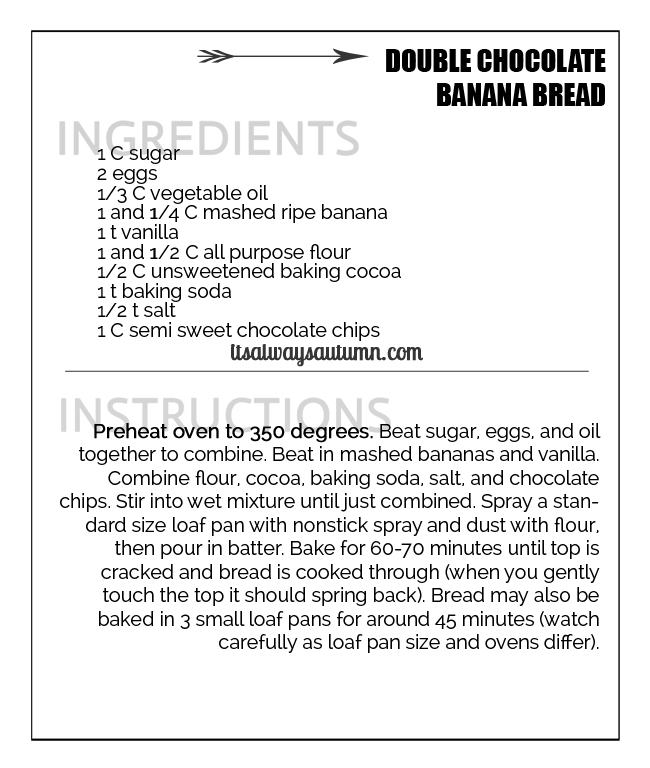
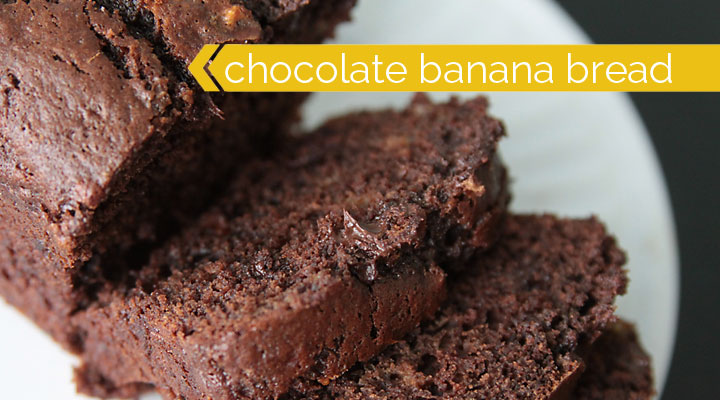
decadent double chocolate banana bread recipe - perfect for gifting!
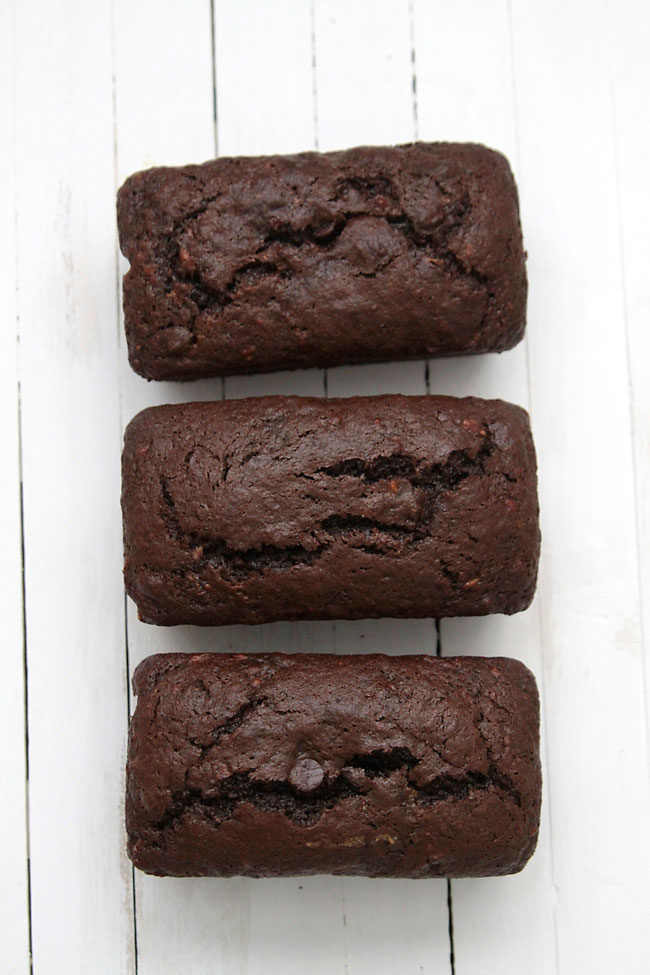
They key with this bread, as with all quick breads, is to be careful about the cooking time. It’s tempting to take it out early – in a full sized loaf it needs to cook just over an hour, which seems like a really long time. But if it comes out too early it will sink in the middle, and undercooked bread isn’t nearly as tasty as, say, undercooked cookies. When it’s done the top will be cracked (like you can see in the photo above) and when you gently press down on it with your finger it will spring back up instead of staying depressed. If it sinks a tiny bit as it cools, don’t worry too much, it will still taste good. When I bake it in 3 smaller loaf pans the cook time is generally somewhere between 40 and 50 minutes, but again, you’ll just need to watch it the first time since loaf pan size and oven temps vary a bit. I find letting it rest in the pan for at least 10 minutes after removing from the oven makes it easier to get out.
This bread is delicious warm, but it’s even better completely cooled – the banana and chocolate flavors both intensify as it sits. I actually really love it refrigerated with a cold glass of milk.
Click here for the printable recipe card.
decadent double chocolate banana bread recipe - perfect for gifting!
decadent chocolate banana bread recipe - easy and perfect for giving!


Cocoa Banana Bars

Cocoa Banana Bars Recipe:
 (Makes 20 slices/bars)
Ingredients:
1 cup oatmeal (not quick)
1 cup self rising flour
1/2 cup + 1 tablespoon sugar
1/4 cup melted butter
1/4 cup  milk
2 tablespoons cocoa powder
3 medium bananas, mashed
Directions:
Preheat oven to 350 degrees F and grease a 9 x13 inch pan.  Combine melted butter, cocoa powder, milk and banana in a small bowl.  Place oatmeal, flour and sugar in a mixing bowl, mix well.  Add wet ingredients into flour mixture, stir until well incorporated.  Spoon into prepared pan, and level the top with a back of a spoon or spatula.  Bake for 25 minutes or until a skewer inserted comes out clean.
Let sit in the pan for 5 minutes, slice while they are still warm.
(Recipe from Treat n’ Trick)

Thursday, September 4, 2014

Martha Stewart Pound Cake

Ingredients

  • 1 cup (2 sticks) unsalted butter, room temperature, plus more for pan
  • 2 cups all-purpose flour (spooned and leveled), plus more for pan
  • 1 cup sugar
  • 4 large eggs
  • 2 teaspoons pure vanilla extract
  • 1/2 teaspoon salt

Directions

  1. Step 1

    Preheat oven to 350 degrees. Butter and flour a 6-cup (8 1/2-by-4 1/2-inch) loaf pan; set aside.

      In this step:

  2. Step 2

    Using an electric mixer on high speed, beat butter and sugar until light and fluffy. Add eggs one at a time, beating well after each addition; add vanilla and salt. With mixer on low, gradually add flour, beating just until combined (do not overmix).
  3. Step 3

    Bake until a toothpick inserted in center of cake comes out clean, about 1 hour (tent with aluminum foil if browning too quickly). Let cool in pan 15 minutes. Invert onto a wire rack, and turn upright to cool completely.

      In this step:

Pioneer Woman Pound Cake

Perfect Pound Cake

Prep Time:
Cook Time:
Difficulty: Easy
Servings: 12

Ingredients

  • 3 sticks Butter
  • 3 cups Sugar
  • 5 whole Eggs
  • 1 teaspoon Butter Flavoring
  • 2 teaspoons Lemon Flavoring
  • 3 cups All-purpose Flour
  • 1 cup Sprite, 7-UP, Or Sierra Mist

Preparation Instructions

Preheat oven to 325 degrees.
Cream butter. Add sugar, 1 cup at a time, mixing after each addition. Add eggs, 1 at a time, mixing after each addition. Add butter and lemon extracts and mix well. Add flour, 1 cup at a time, mixing well after each addition. Add soft drink, then mix together until combined. Scrape sides of bowl, then mix briefly.
Pour into a greased Bundt pan and bake for 1 hour to 1 hour 10 minutes, until the cake is no longer jiggly.
Remove cake from oven and invert pan until cake drops out. Slice and chow down!
Posted by on January 14 2010

Wednesday, January 15, 2014

Cinnamon Sugar Breakfast Puffs

Cinnamon Sugar Breakfast Puffs

The Breakfast Puffs
  • 1/3 cup unsalted butter
  • 1/2 cup sugar
  • 1 large egg, at room temperature
  • 1 1/2 cup all purpose flour
  • 1 1/2 teaspoon baking powder
  • 1/2 teaspoon salt
  • 1/4 teaspoon nutmeg
  • 1/4 teaspoon allspice
  • 1 pinch ground cloves
  • 1 pinch ground ginger
  • 1 teaspoon orange zest
  • 1/2 cup whole milk, at room temperature
Cinnamon-sugar coating
  • 6 tablespoons butter, melted
  • 1/2 cup granulated sugar
  • 1 teaspoon ground cinnamon
  1. In a heavy bottomed pan, heat the 1/3 cup butter, and cook over medium-high heat, stirring frequently, until browned and nutty smelling. Pour into a mixing bowl and allow to cool completely to room temperature.
  2. Preheat your oven to 350F. Grease and lightly flour a 12 cup muffin tin.
  3. Add the sugar and egg to the cooled butter. Beat with an electric mixer until all creamed together.
  4. In a separate little bowl, combine the flour, baking powder, salt, spices, and zest. Add the dry ingredients in increments to the butter-sugar mixture, alternating with the milk and beating well after each addition.
  5. Divide the batter evenly into the cups of the muffin tin. Pop into the oven and bake until golden brown and fragrant, about 20-25 minutes.
  6. While the puffs are puffing, put the melted butter in one shallow bowl and combine the sugar and cinnamon in another one. When the puffs come out of the oven, use a knife to gently pop them all out of the muffin tin.
  7. One by one, dip each puff in the melted butter - get it all over it - then roll it in the cinnamon sugar. Transfer it to some lovely, festive serving platter, and continue until you have rolled all of the puffs. Serve warm - they are by faaaaar the best when they are still warm - with coffee, and mimosas, and other goodies.

Friday, November 2, 2012

Cocoa Brownies

Cocoa Brownies

This is one of those… I-need-a-good-and-chocolatey-dessert-that-is-totally-quick-and-easy… kind of recipes.  I promise.
My husband’s family was coming over sort-of last-minute recently.  The sort of last minute where your husband says, “Oh yeah, I invited my family over for dinner tonight,” and forgets to tell you until the day-of.  Yeah, that kind of last minute.   The dinner part was easy- just grilled chicken and salad.  And I’m never, ever, ever big on buying already-made dessert from the grocery store, so I pulled a baking cookbook off my shelf that I hadn’t really used yet to see if I could find some easy inspiration in there.  I did!  I spotted brownies:  Cocoa Brownies


These brownies came together and were in the oven in about 15 minutes.  And with the way those brownies look right there… why would you ever want to eat a boxed version?  Seriously.  I mean, I’d eat a boxed brownie for sure- they’re good and all.  But this homemade brownie recipe pretty much rocked the house over a boxed mix.

Here’s the lady we get to thank for this brownie:  Alice Medrich.  If you’re not familiar with her already, Medrich is an 8-time, award-winning cookbook author and pastry chef, and she is considered one of the country’s foremost experts on chocolate and chocolate desserts.  I can’t believe this is the first thing I’ve baked from this Chewy, Gooey, Crispy, Crunchy cookbook!  Why the heck did I wait so long?  I can’t wait to bake more from this book- all kinds of cookies and bars, and Medrich even includes several wheat-free and dairy-free options.  I’d say it’s a good cookbook to have on the shelf for those who get strong urges to bake often (like me!)

These brownies turn out to be extremely soft and gooey in the center.  The tops crinkle ever-so-slightly, and turn out a slight crunch that the tops of brownies are supposed to have.

Needless to say, they were a big hit as an after-dinner dessert.  My husband’s family is known for enjoying their chocolate, and they gave these a major thumbs up.
I say… they were a lifesaver.  Dear husband, I love you so… but please give me a day or two’s notice next time if you’re going to invite a crowd to dinner :)
Find out more about Alice Medrich by visiting her website, and you can purchase her Chewy Gooey Crispy Crunchy cookbook on Amazon. 

Cocoa Brownies

Yield: Sixteen 2-inch or 25 smaller brownies
Prep Time: 15 min
Cook Time: 20 min

Ingredients:

11 tablespoons unsalted butter
1 1/4 cups (8.75 ounces) granulated white sugar
1 scant cup (3 ounces) unsweetened cocoa powder, natural or Dutch process
1/4 teaspoon salt
1 teaspoon vanilla extract
2 large eggs
1/3 cup + 1 tablespoon (1.75 ounces) Gold Medal® All-Purpose Flour

Directions:

1. Preheat the oven to 325 degrees F. Line the bottom and all 4 sides of an 8-inch square pan with foil. Position a rack in the lower third of the oven.
2. Melt the butter in a medium, heatproof bowl set directly in a wide skillet of barely simmering water. Add the sugar, cocoa and salt. Stir until the ingredients are blended and the mixture is hot. Remove the bowl from the skillet and set aside briefly until the mixture is only warm, not hot. Mix in the vanilla. Add the eggs, one at a time, mixing vigorously with a rubber spatula after each addition. When the mixture looks thick, shiny, and well-blended, add all of the flour at once and stir until you cannot see it any longer. Then mix vigorously for 40 strokes with a wooden spoon or rubber spatula. Spread the batter evenly in the lined pan.
3. Bake for 20 to 25 minutes, until a toothpick plunged into the center emerges slightly dirty looking. Cool on a rack. Lift the edges of the foil liner and transfer the brownies to a cutting board. Cut into 16 or 25 squares. May be kept in a covered container for 2 to 3 days.

Tips:

**Gluten free folks: I have not tried this recipe as gluten-free yet, but there is not a whole lot of flour in the recipe- just 1/3 cup, so I'm hoping that a gluten-free flour blend can be substituted in this recipe without too much trouble. If you try it, please let me know of your experience with it!
Source: RecipeGirl.com (via the cookbook: Chewy, Gooey, Crispy, Crunchy Melt-in-Your-Mouth Cookies by Alice Medrich)

Pumpkin Coffee Cake

Pumpkin Coffee Cake


Pumpkin Coffee Cake


Yield: 12 servings
Prep Time: 20 min
Cook Time: 50 min
It's like pumpkin pie tucked into the middle of coffee cake!

Ingredients:

CAKE:
1/2 cup butter, at room temperature
3/4 cup granulated white sugar
1 teaspoon vanilla extract
3 large eggs
2 cups all-purpose flour
1 teaspoon baking powder
1 teaspoon baking soda
1 cup sour cream
One (16 ounce) can unsweetened pumpkin puree
1 large slightly beaten egg
1/3 cup granulated white sugar
1 teaspoon pumpkin pie spice
STREUSEL TOPPING:
1 cup packed light brown sugar
1/3 cup butter, softened slightly
2 teaspoons ground cinnamon
1 cup chopped pecans or walnuts, optional

Directions:

1. Preheat oven to 325°F. Spray a 9x13-inch pan with nonstick spray.
2. Prepare cake: Use an electric mixer to cream together the butter, sugar and vanilla in a large bowl; add eggs and beat well. In a separate bowl, whisk together flour, baking powder, and baking soda. Mix dry ingredients into the butter mixture half at a time, alternating with half of the sour cream. In another bowl, combine pumpkin, egg, 1/3 cup sugar, and pie spice. Keep separate.
3. Prepare topping: Mix the topping ingredients together with fork or hands until crumbly. Set aside.
4. Spoon half of the batter mixture into the prepared pan. Sprinkle half of the streusel topping over the batter. Spread the pumpkin mixture over the streusel. Carefully spread the remaining batter over the pumpkin mixture. Sprinkle remaining streusel on top.
5. Bake 45 to 50 minutes, or until toothpick inserted in center comes out clean.
Source: RecipeGirl.com

Spiced Pear Cake with Browned Butter Icing

Spiced Pear Cake with Browned Butter Icing


Oh yeah, see that icing drizzle?  It’s a must… an absolute must.  And you get more bang for your buck with this recipe since it makes TWO cakes :)

Speaking of bucks, I was at the market the other day checking out things in the baking aisle.  Gold Medal flour was 2 for $5 in my market.  With the holiday season approaching, and knowing that I’m a total baking FREAK in November and December, I stocked up big time.  Yes, the checker looked at me funny when I bought 8 bags of flour in one order!  Gold Medal has new packaging for its flour- you may have noticed some of the colorful bags on the shelves.  For this recipe, I used their Whole Wheat Flour and their Organic All-Purpose Flour.

I opted to make this recipe in two loaf pans because I like to change things up a bit and make cakes in “tea loaf” fashion now and then.  I think it works best for this recipe.  The cake bakes up much like banana bread, but it’s too sweet to call it bread.  So it’s CAKE, my friends.

Here’s the super yummy part:  BROWNED BUTTER ICING.  Do not leave off the icing.  Seriously, don’t do it.  It’s so so so easy to make, and you will want to eat it by the spoonful before you even drizzle it onto the cake.  Not that I’m advocating that or anything, but it certainly gives you a good idea of how delicious this stuff is.

S.P.O.O.K.Y.

A little slice of this cake… with those spiced pears flecked throughout… and just the right amount of browned butter icing drizzled on top… is a perfectly nice dessert for fall (and for the abundance of fresh pears available right now).

So, if you happen to be in a position where you’re considering where the best place to buy a home is for families… check out the cul-de-sacs.  They’re also a good place to be if you need to pawn off food on neighbors as much as I need to.  My neighbors act as good taste-testers, and there are a plethora of little mouths to feed too.  Remember I mentioned that this recipe makes TWO cakes?  Well, that nice neighbor who gave me the pears ended up getting them back again in one of these cakes.  Yep, I gave her a cake.  That happy-neighbor-thing is just kind of sickening to hear, isn’t it?
Well, don’t get too envious of my neighbor situation… there WAS the time that Neighbor C‘s kid sling-shot a rock into the air and it hit the windshield of my parked car and they never offered to pay for the repair… (fyi- those neighbors don’t get any of my goodies, lol!)

Spiced Pear Cake with Browned Butter Icing


Yield: 2 loaf cakes (12 to 16 servings)
Prep Time: 30 min
Cook Time: 60 min

Ingredients:

CAKE:
3 medium to large firm pears, peeled-cored- and chopped
2 tablespoons granulated white sugar
2 tablespoons packed light brown sugar
1 1/2 teaspoons ground cinnamon
1/4 teaspoon ground nutmeg
2 cups Gold Medal® All-Purpose Flour
1 cup Gold Medal® Whole Wheat Flour
3 teaspoons baking powder
1 teaspoon salt
1 1/2 cups granulated white sugar
4 large eggs
3/4 cup milk
1/2 cup vegetable or canola oil
1/2 cup unsweetened applesauce
BROWNED BUTTER ICING:
4 tablespoons (1/2 stick) salted butter
2 cups sifted powdered sugar (more or less)
4 to 5 teaspoons boiling hot water
1 teaspoon vanilla extract

Directions:

1. Arrange your oven rack to the lower third of the oven. Preheat the oven to 350 degrees F. Spray two 5x8-inch loaf pans with nonstick spray.
2. In a medium bowl, toss the pears with the white and brown sugars, cinnamon and nutmeg. Set aside.
3. In a separate bowl, whisk together the flours, baking powder and salt.
4. In a large bowl, whisk together the sugar, eggs, milk, oil and applesauce. Whisk in the dry ingredients until they are just mixed in (don't over-mix). Stir in the pears and all of their sweet and spicy juices too. Divide the batter between the two pans. Bake 60 to 70 minutes, or until the loaves are baked through and test done (toothpick inserted in the centers comes out clean). Let the cakes cool for 15 minutes, then turn them out onto a rack to cool completely.
5. When cake is cool, prepare the icing. Melt the butter in a small saucepan over medium heat. Heat and stir for 5 to 7 minutes, or until the butter is lightly browned (you will see little flecks of brown throughout the melted butter when it is properly browned). Remove it from the stove and pour it into a bowl. Whisk in 1 cup of the powdered sugar. Add 3 teaspoons of the water and the vanilla. Whisk in more powdered sugar a little at a time until it thick but still pourable (add a teaspoon or two of additional water, if needed). Place paper towels under the rack and drizzle the icing onto the cakes. Serve immediately, or store in a covered container until ready to serve.

Source: RecipeGirl.com
Tuesday, January 3, 2012

Boston Cream Pie

Recipe:
Pastry Cream:
1/4 cup  granulated white sugar
3 large egg yolks
1/8 cup all-purpose flour
Scant 3 tablespoons  cornstarch
1 1/4 cups  milk
1 teaspoon vanilla
 
Sponge Cake:
5 large eggs
3/4 cup granulated white sugar, divided
1/2 teaspoon pure vanilla extract
1/2 cup plain cake flour (not self-rising)
1/4 cup all purpose flour
1 teaspoon baking powder
1/4 teaspoon salt
3 tablespoons milk
2 tablespoons unsalted butter
 
Chocolate Glaze:
4 ounces semisweet chocolate, finely chopped
1/2 cup heavy whipping cream
1 tablespoon unsalted butter
 
Instructions:
Pastry Cream: In a medium-sized heatproof bowl, mix the sugar and egg yolks. In another bowl, sift or whisk the flour and cornstarch together and then add to the egg mixture, mixing until you get a smooth paste. 
 
Meanwhile in a small saucepan, bring the milk just to a boil over medium heat. Pour the milk slowly into the egg mixture, whisking constantly to prevent curdling. (Strain if necessary.) Then place the egg mixture into a medium saucepan and cook over medium heat until boiling, whisking constantly. When it boils, continue to whisk constantly for another minute or so until it becomes thick. Remove from heat and whisk in the vanilla extract. Pour into a clean bowl and immediately cover the surface with plastic wrap to prevent a crust from forming. Let the cream cool in the refrigerator for a few hours.
 
Sponge Cake: Preheat oven to 350 degrees F (177 degrees C) and place rack in center of oven. Butter and line the bottoms of two-8 inch (23 cm) round cake pans with parchment paper. 
While the eggs are still cold separate three of the eggs, placing the yolks in one bowl and the whites in another bowl. To the yolks, add the two remaining eggs. Cover the bowls with plastic wrap and allow the eggs to come to room temperature (about 30 minutes).

Meanwhile, in a bowl whisk together the flours, baking powder, and salt. Place the milk and butter in a small saucepan, over low heat, and warm until the butter melts. Remove from heat, cover, and keep warm.
In your electric mixer, fitted with the paddle attachment, (or with a hand mixer) beat the whole eggs and yolks and 1/2 cup (100 grams) of sugar on high speed until they are thick and fluffy (3-5 minutes) (when you slowly raise the beaters the batter will fall back into the bowl in a slow ribbon). Beat in the vanilla extract. 

In a clean bowl, with the whisk attachment, (or with a hand mixer) beat the egg whites at low speed until foamy. Increase the speed to medium-high and gradually add the remaining sugar, beating until soft, moist peaks form. Gently fold a little of the whites into the batter to lighten it, and then add the rest of the whites folding just until incorporated. Sift half of the flour mixture over the top of the batter and gently fold through with a rubber spatula or whisk. Sift the remaining flour over the batter and fold in.

Make a well in the center of the batter and pour the melted butter/milk mixture into the bowl. Gently but thoroughly fold the butter mixture into the batter. Divide the batter evenly between the two pans and bake for about 18 - 20 minutes or until light brown and springy to the touch. (A toothpick inserted in the middle will come out clean.) Remove from oven and place on a wire rack to cool. Immediately run a spatula around the inside of the pans and then invert the cakes onto a wire rack. Remove parchment paper and re-invert. Cool completely.

Chocolate Glaze: Place the chopped chocolate in a small heatproof bowl. Bring the cream and butter just to a boil in a saucepan over medium heat. Immediately pour the boiling cream over the chocolate and gently stir until chocolate has melted. Set aside until it has thickened to pouring consistency.

Assemble: Place one cake layer on your serving plate, bottom side facing up. Spoon the pastry cream onto the cake, spreading to make an even layer. Place the second cake layer (top side up) onto the filling. Pour the glaze onto the center of the cake and, using an offset spatula, spread the glaze to the edges of the cake, allowing the glaze to drip down the sides. Let the cake sit until the glaze sets, about one hour. This cake is best eaten the same day it is made. Cover and refrigerate any leftovers.
Serves 8-10
Read more: http://www.joyofbaking.com/BostonCreamPie.html#ixzz1iSZNMhyi

Saturday, September 17, 2011

Meyer Lemon Pound Cake

I got this off of www.dessarts.com

Post image for Meyer Lemon Pound Cake
So this post is a little overdue. Last week I posted some links I found for desserts containingMeyer lemons.  I had a lot of trouble trying to figure out what I wanted to do with my Meyer lemons. So, of course, I went back to my first instinct which was to make a pound cake. As I was reading other food blogs this week, I came across a beautiful vanilla bundt cake fromSweetapolita. It was a simple recipe with an elegant result. I then realized that sometimes keeping it simple is the best answer. A nice slice of this simple poundcake made up for the dreary New York weather that has taken over this week.
Meyer lemon Poundcake
I chose Martha Stewart’s glazed lemon pound cake recipe but used Meyer lemons instead or regular lemons. Since Meyer lemons are not as tart, I doubled the amount of zest and juice in her recipe. It all worked out nicely since the added liquid from the juice compensated for the 1/2 egg that I left out.
Doubling the amount of lemon in this recipe did not really produce as  strong of a taste as I thought.  If you really want that lemon flavor to stand out, I suggest adding some lemon extract. I did not mind the subtle orange/lemon taste of the cake. The cake itself is not overly sweet either. I thought the white chocolate glaze gives this cake just the right amount of added sweetness.
The top of the cake is garnished with Meyer lemon chips.  I will hopefully be  posting how to make these chips soon.
Recipe (Adapted from Martha Stewart)
makes 1 loaf (9 by  5  inch pan)

1 1/2 cups all-purpose flour, plus more for pan
3/4 teaspoons salt
1/4 teaspoon baking powder
1/4 teaspoon baking soda
1/2 cup unsalted butter, softened, plus more for pan
3/8 cup low-fat buttermilk
1/3 cup fresh lemon juice (about 2 lemons)
Zest of 2 lemons, finely grated
1 cup sugar
2 large eggs
Preheat the oven to 350F. Prepare a 9 by 5 inch loaf pan by coating with butter and dusting with flour. Sift together the flour, salt, baking powder, and baking soda in a bowl.  Mix the buttermilk, zest and lemon juice in a small bowl and set aside. Cream the butter and sugar in an electric mixer until light and fluffy. Add the eggs one at a time until fully incorporated. Scrape down the sides of the bowl as necessary. Add the flour mixture in three parts alternately with the liquid mixture and beat until just smooth. Pour the mixture into the pan and bake for 50 -60 minutes or until a toothpick inserted in the center comes out clean. If the top is browning too quickly cover it with a foil tent. Allow the cake to cool in the pan for 10 minutes. Remove and cool completely.
White Chocolate Glaze (from Martha Stewart’s Baking Handbook)
3/4 cup confectioners sugar
2 Tbs milk
2 1/2 oz white chocolate (melted and cooled)
Whisk together the sugar and milk. It should be the consistency of thin sour cream. Add the white chocolate and stir. If it is too thick add milk a teaspoon at a time. If it is too thin add sugar. Use immediately.

Pumpkin Spice Bars with Cream Cheese Frosting


Prep Time  20 Minutes         Total Time 2:50 (with cooling time)          Makes 49 bars

Bars
4eggs
2cups granulated sugar
1cup vegetable oil
1can (15 oz) pumpkin (not pumpkin pie mix)
2cups Gold Medal® all-purpose flour
2teaspoons baking powder
1teaspoon baking soda
1/2teaspoon salt
2teaspoons ground cinnamon
1/2teaspoon ground ginger
1/4teaspoon ground cloves
1cup raisins, if desired

Cream Cheese Frosting

5 oz cream cheese, softened
5 Tbutter or margarine, softened
2to 3 teaspoons milk
1teaspoon vanilla
4cups powdered sugar
1/2cup chopped walnuts, if desired
  1. Heat oven to 350°F. Spray 15x10x1-inch pan with cooking spray.
  2. In large bowl, beat eggs, granulated sugar, oil and pumpkin with wire whisk until smooth. Stir in flour, baking powder, baking soda, salt, cinnamon, ginger and cloves. Stir in raisins. Spread in pan.
  3. Bake 25 to 30 minutes or until toothpick inserted in center comes out clean and bars spring back when touched lightly in center. Cool completely, about 2 hours.
  4. In medium bowl, beat cream cheese, butter, milk and vanilla with electric mixer on low speed until smooth. Gradually beat in powdered sugar, 1 cup at a time, on low speed until smooth and spreadable. Spreading frosting over bars. Sprinkle with walnuts. For bars, cut into 7 rows by 7 rows. Store covered in refrigerator.

Thursday, September 1, 2011

Grandma's Poppy Seed Bundt Cake

1 Yellow Cake Mix with pudding
1 3oz pkg Instant French Vanilla Pudding
1/2 cup oil
1 Cup water
4 eggs
3 tablespoons poppy seeds

Cinnamon Sugar 1tsp Cinnamon +1/3 c sugar

Stir all together and beat well. Prepare bundt pan by spraying well with Pam. Sprinkle with cinnamon sugar. Pour about 1/3 of batter into pan Sprinkle with cinnamon sugar then pour in remaining batter. Sprinkle rest of cinnamon sugar.
Bake at 350 for 45 minutes
Let Cook 5-10 Minutes before removing from the pan.

 I like to top it with powder sugar glaze!

(powder sugar + milk to make a runny glaze!)